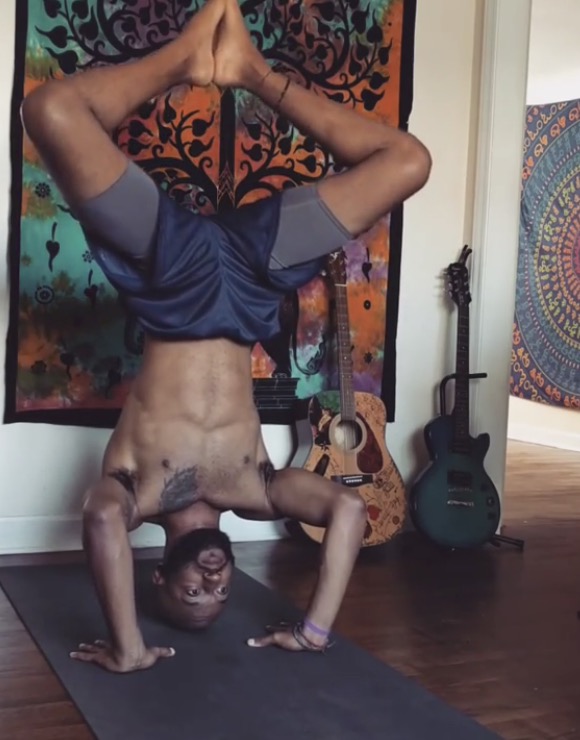
Tripod - Supported Headstand
Learn how to #tripodheadstand!
I’m a bit of an #inversionjunkie myself and I know that headstands are poses that a lot of us Yogis want to master. There are many versions of headstand but I believe that tripod is the most accessible because you get the extra support of your hands. Read below to learn how to do it!
••
1. Begin in #heropose facing a wall about 2-4ft away from the wall depending on your height
••
2. Lean forward and place your hands on the mat about a foot away from your knees, shoulder width apart. Then place the top of your head on your yoga mat slightly behind your hands. If you don’t have a mat use a folded blanket
••
3. Curl your toes under and lift your hips up toward the sky by extending your legs out long. Begin to walk your feet towards your face and try to get them as close to your face as possible — we want to get our hips above our head
4. When you can’t walk in any further, take your right knee and place it on your right elbow & then do the same with your left knee & elbow. Put your big toes together, find your balance, and STAY HERE if you want to! This is a great place to start and you get all of the benefits of being inverted
••
5. If you want to go further, lift up your hips by rotating them upwards and then slowly peel your legs up towards the sky. Sorry my feet move out of the frame but they are pointing towards the ceiling as that helps maintain balance. If you fall backwards, use the wall to catch yourself
••
6. Hold headstand for 3-5 breaths or as long as you comfortably can and then try to lower your legs slowly and with control by engaging your core, grounding your hands into your mat, and leaning your weight slightly towards the wall. Finish by taking a few breaths in child’s pose to allow blood flow to return to normal
••
You’ll probably fall a lot in the beginning and that’s okay! Don’t let the fear of falling stop you. If you have any questions, hit me up!”
Micheal Sinclair


